Tuesday, July 31, 2007

breaking 100k on the truss with some planks


Remember when I used to whine about 15,000 atoms? Well, I'm past that. Placing these four diamond planks over the truss has brought the atom count up to 121,812. Not all the planks are completely bonded to the truss yet, but I wanted to see if it would be possible for my system to work with a part this large. It takes a lot of patience, but it's not impossible.

I wanted to get a QuteMol graphic, but there is some combination of A8 and QuteMol that doesn't like larger files. Tubes get dropped and crust gets formed. I still haven't tried saving a large protein data bank file in the A9 version.

I don't really think this is a practical way to simulate the truss under stress. I would have to attach dozens (hundreds?) of linear motors to individual carbon atoms on the slabs which would then transmit some of the force to the truss, but I think it looks pretty cool.

the bonded carbon nanotube octet truss


The atom count for this truss came to 63,900. I am going to leave the remaining junctions un-bonded until I decide if/how I will simulate it. I may want to use them to bond to a diamond slab or something. However capping those would, after all this, be trivial.

putting the truss together


Here is how I am putting the truss together. First I cut each spoke in half and seperate each one into two chunks. Then when I want to bond two hubs together I delete the front chunks of the connecting spokes and bond the back chunks together. In the above picture you can see the back chunk highlighted.

Bonding the spokes:


After adjusting them:

I will repeat this process to build the truss.

If it turns out good, I will say something like "I knew it all along". If for some unforeseen reason it doesn't, then I will say "I wish I had an octet truss to hold up my heart right now".

MTF

Monday, July 30, 2007

water saved me


So everything is bonded together at the hub. It went much faster during this session, thanks a lot to the water function. Turning on this view places a semi-transparent filter across the part. The depth of the water (its position relative to the viewer) is adjustable, and only atoms above the surface are "pickable". When I first started I was rather overwhelmed with all the open carbon atoms. Atoms that looked next to each other would actually be across the hub.

First I tried hiding tubes not in the immediate area I was working on, but I really need the whole picture all the time. Then I tried displaying different tubes in CPK view (This is the solid view that the previous two pictures use. Now I believe it stands for Corey, Pauling and Koltun and not California Pizza Kitchen. Trust me; you don't want to make that mistake at a cocktail party with a bunch of chemists <- and NEVER leave your cocktail unattended*), but this view still obscured too much. Finally I switched to water, and all was clear.

Now I will focus on clean up. I find it is easier to "rough in" the lattice. By this I mean I try to close as many rings as possible with either hexagons or pentagons, but at this point I don't sweat larger rings, and there are a couple doozies in there. But it is pretty easy to focus on one of these at a time and break them up into smaller, more regular, rings.

Also this part is still unadjusted. By that I mean I have not yet had NE1 adjust the atoms and bonds to a geometry fitting with the molecular mechanics module. I would adjust a few atoms here and there as I was working, but not the whole hub. Don't worry. I am in no way expecting this to distort all my hard work; it has been my experience that this will only tighten things up more.

MTF

* my apologies to any chemists that may take offense to that advice.

Sunday, July 29, 2007

working on the hub

I spent some time to day bonding the spokes together at the hub for the truss. It is slow going, but I am roughly a third of way through. Here is the side I have finished:

Here is most of what's left:

I will chip away at it over the next couple of days.

The C60 pump simulation is at 52% after 188 hours.

Friday, July 27, 2007

getting real close now


A little adjustment here and there and I think it will be good. Then all I have to do is bond the 12 spokes together without having them move.

Also while I am a little too wiped out to start bonding the spokes tonight, I am not too tired to drop a bunch of hubs in to make a large truss, just for looking at. When I did and opened the file in Qutemol to get a good graphic, I got this:

There are some missing tubes and that weird atomic crust on the others. I don't know if that is from Qutemol or if there were problems with saving the protein data bank file. I will try saving it again in alpha 9 and see what happens.

MTF

getting closer on the truss


I am using a different approach now. I won't bond the spokes together at the hub until I know they will line up, again probably one of those hindsight is 20/20 things. You can see that some tubes still need a little more adjusting, but since they are still loose, it's pretty straightforward. I actually hold a protractor up to the screen.

BTW, this is the right configuration isn't it? I have never actually seen one of these things, and Jim's comment was the first time I actually read the word "octet truss"( even though I did read a bio on Buckminster Fuller years ago and some of his poetry [his poetry sucks]), and this is the best reference I currently have.

Also anyone have any ideas on how to test this thing in the simulator? I could just let it sit there and see if it stays together and doesn't wobble a whole lot. What would be great is if it could be put under some stresses, like try to crush it between two diamond slabs. I just don't if I have the computing resources to pull that off though. We'll see.

MTF

more on the truss


I think I need to go back and turn some of these hubs. I had to hide everything but the one I was working on. The atoms count (including the white hydrogens) is 24,828.

I have the tv on next to me for white noise and there is some lady selling cosmetics. I had tuned it out until she said they contained "super-nanotechnology" with "microscopic beads".

Thursday, July 26, 2007

peeece of mynd

So I am heading over to my friend's place for a beer tasting thing (we do ours a little different because we buy a lot of the same kind of beer and test each bottle for uniform taste, the whole bottle, all the way through) when out of the blue I see "piece of mind" flash through my mind. Sorry for all the typos, bad grammer, poor syntax, and over using words like "though", "just", and "however", but this really ain't about the copy, is it?

a 12 spoke hub for the truss


I think this is what Jim was describing in his comments (see post from the 23rd). I had to eyeball the angles, so they are probably a little off. I will add a reference grid I can snap to and better layout tools to my personal NE1 wish list. <- what would be great is if you could select two dots on the grid and connect them with pre-made tubes, allowing you to select all the tube's properties before they are inserted of course.

This didn't take as long to build as I thought it would, just a couple hours. I used the same basic process as the four and six way junctions, position the tubes and fill in the space with a combination of hexagons and pentagons. There are several heptagons in there too, but I think I can swap them out for hexs and pents.

So I guess I just start connecting them together until my computer blows.

Also in the last post when I said you had to combine all the chunks of a part to paste it in the build console, I was not really accurate. At the time I forgot you could just insert a complete part with all its chunks still seperate. Insert/Paste: two different features. I just wanted to clear that up for my own piece of mind.

The full pump simulation is still whirling away.

MTF

Tuesday, July 24, 2007

truss techniques improving


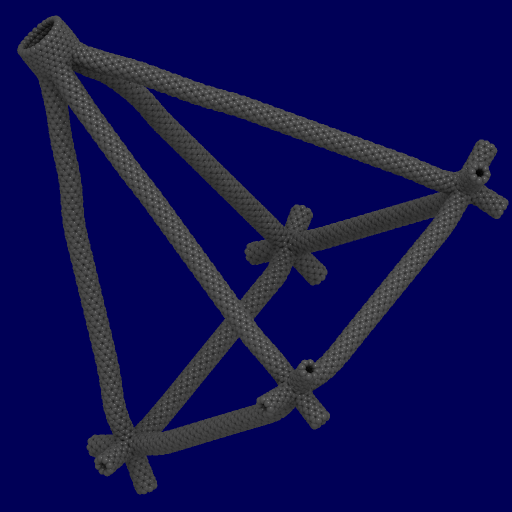
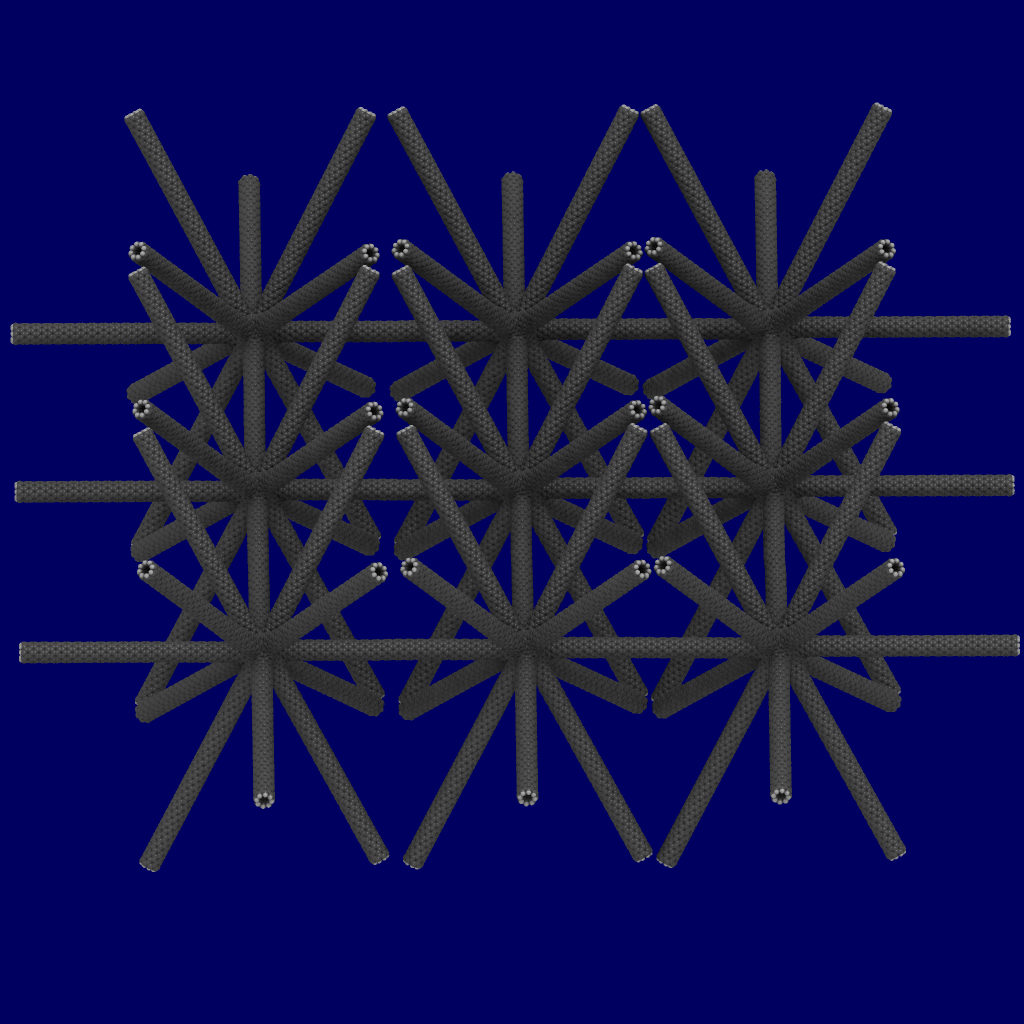
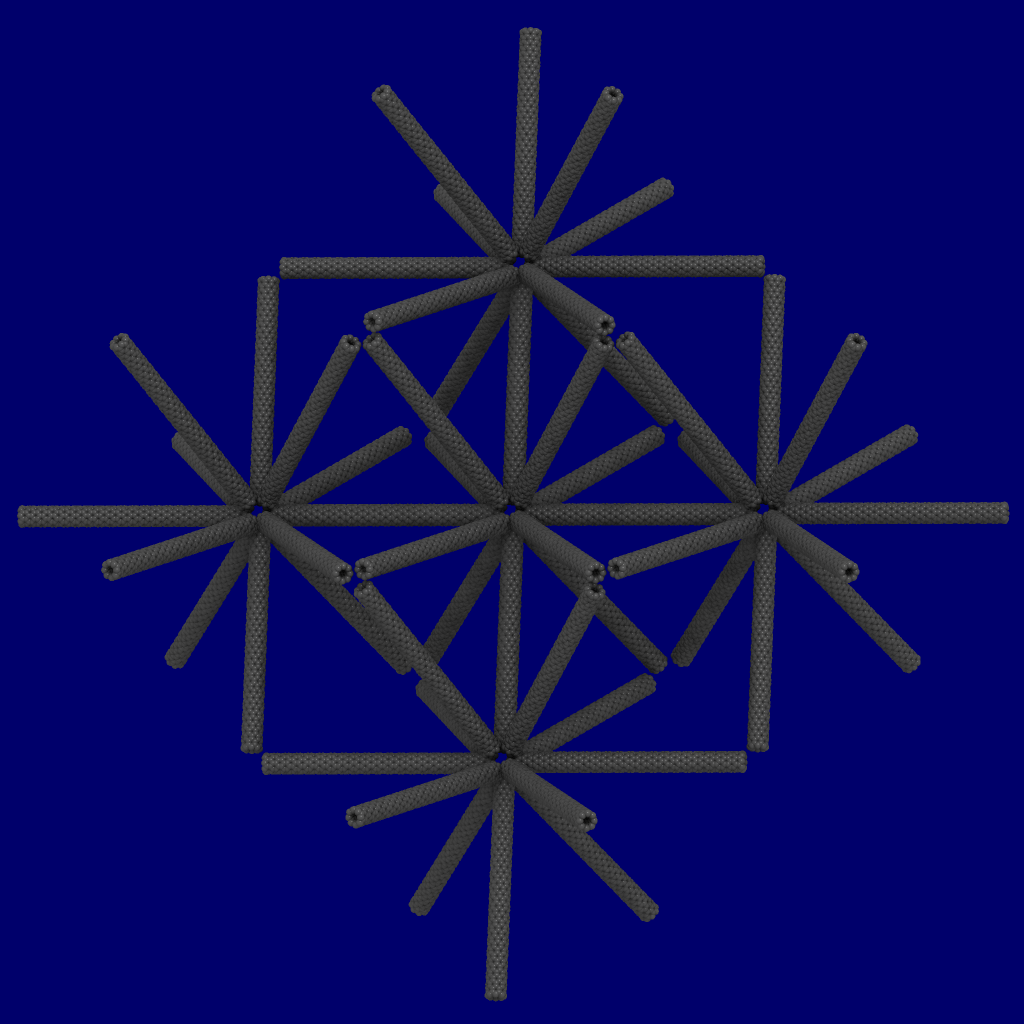
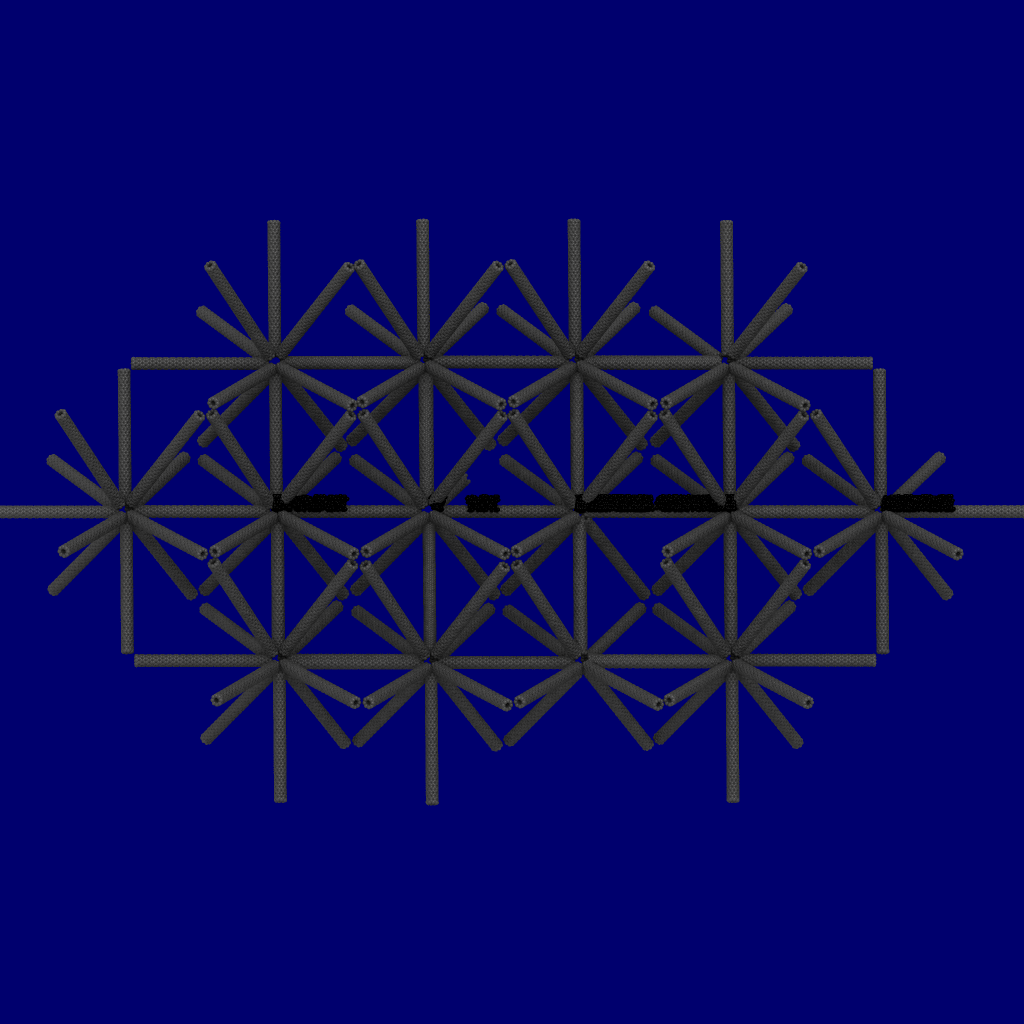
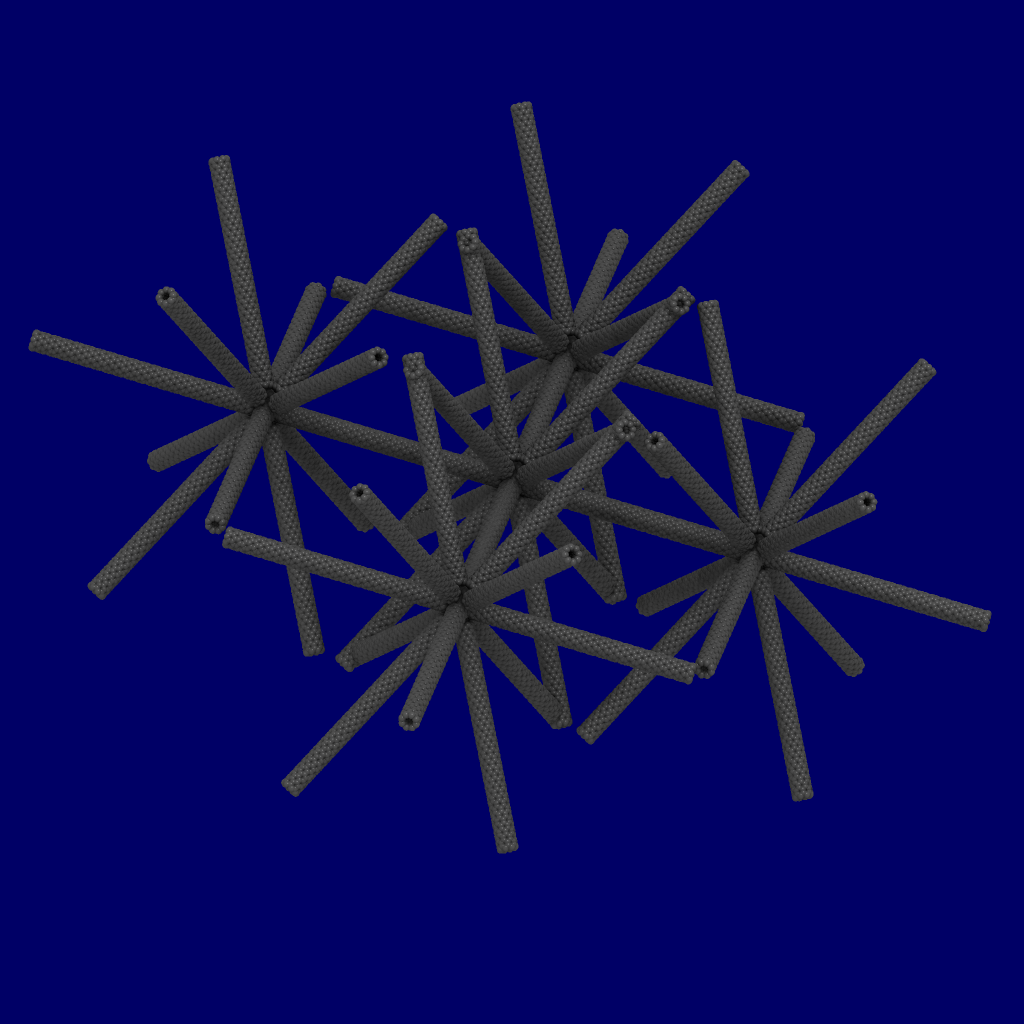
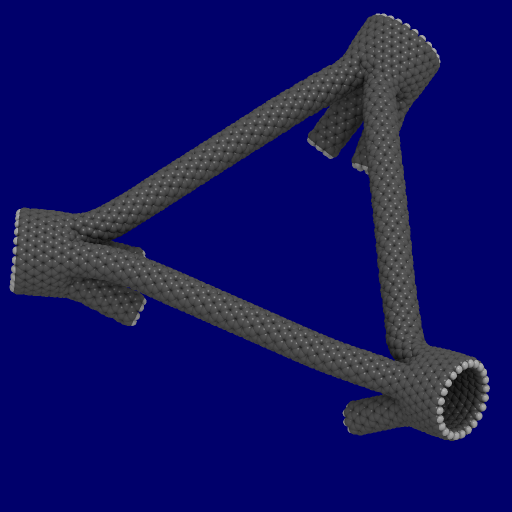
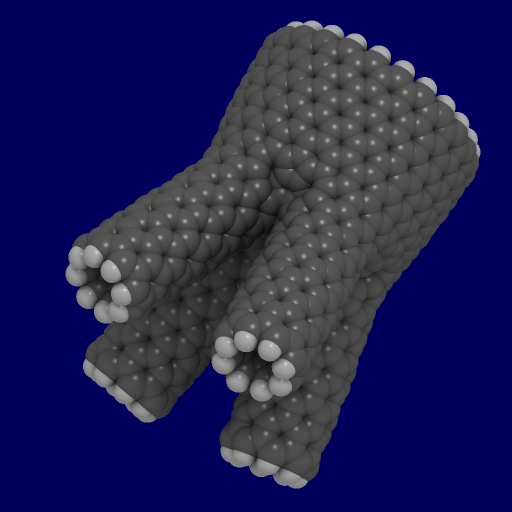
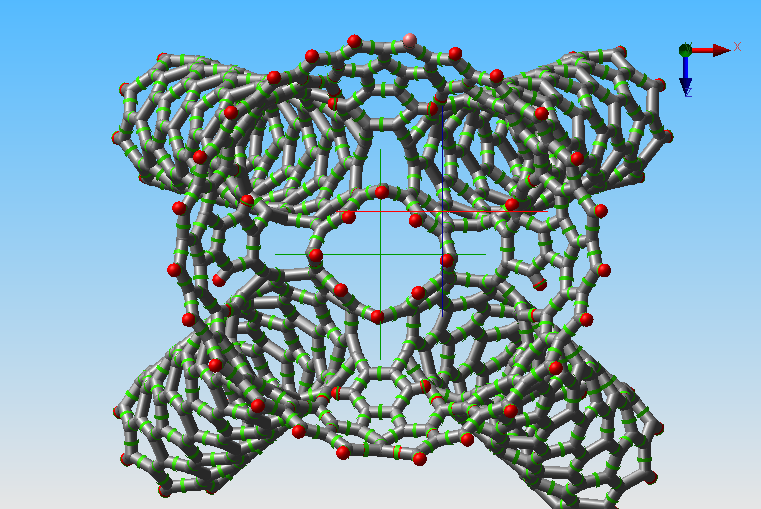
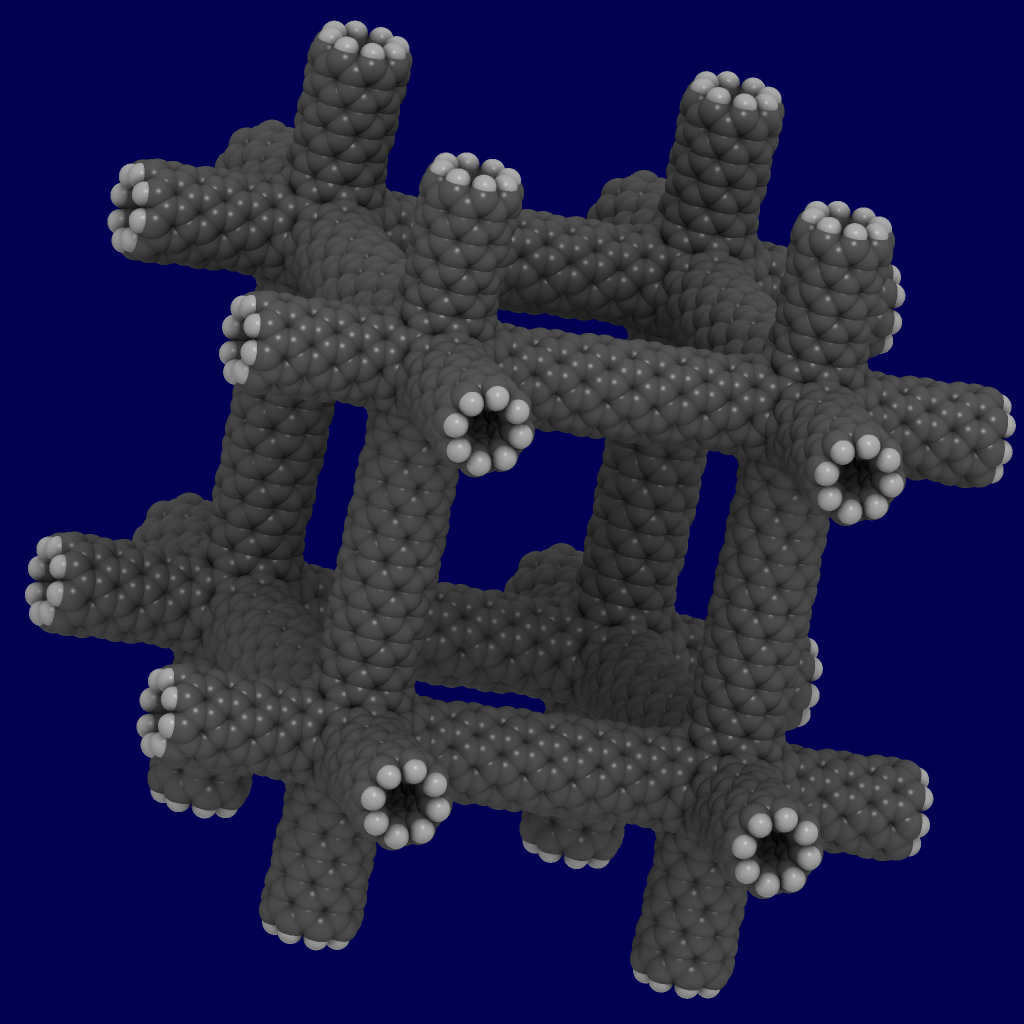
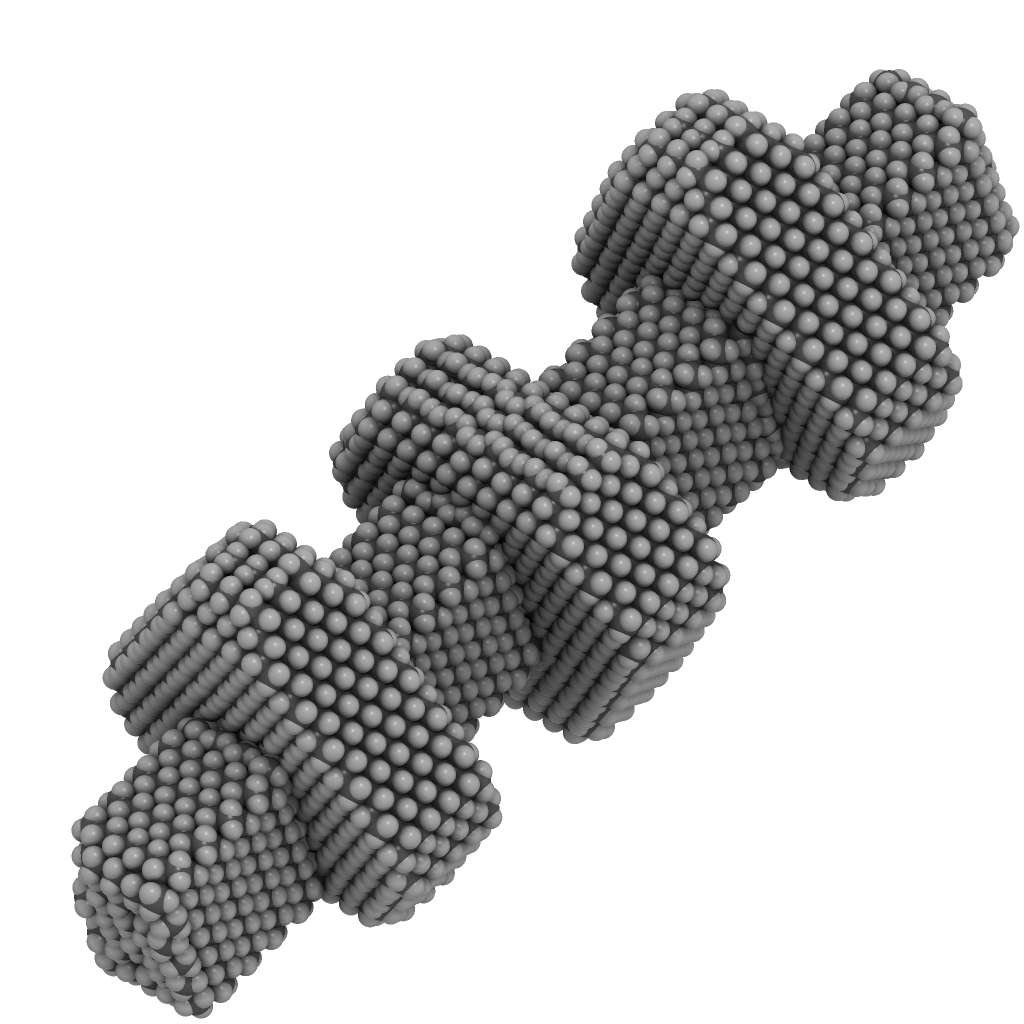
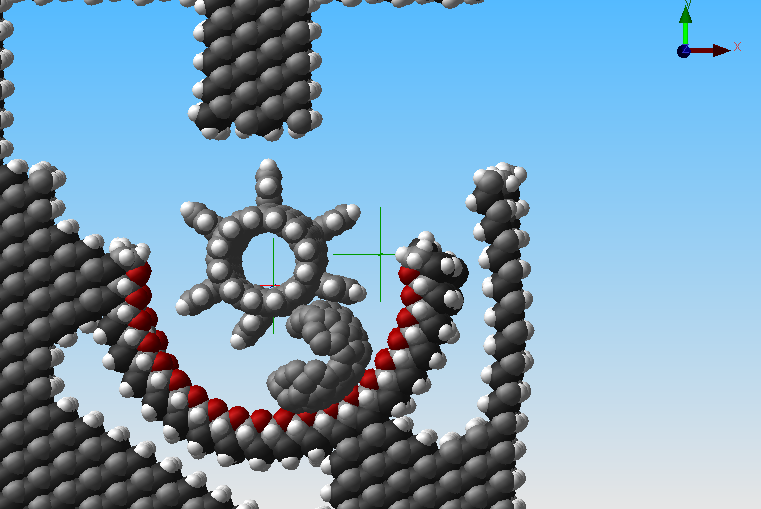
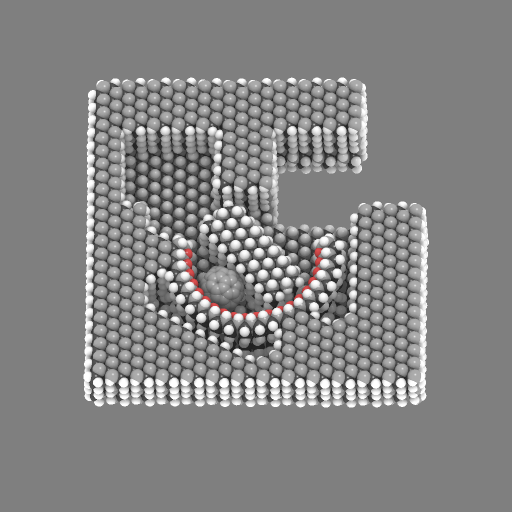
Yeah, so to clear up any lingering confusion, I am still building sections of sections, and developing more efficient ways to do it, which I have. I know this pyramid still looks a little rough, and not quite regular, but it only took a couple hours to build the whole thing opposed to a few hours for the partial one below.

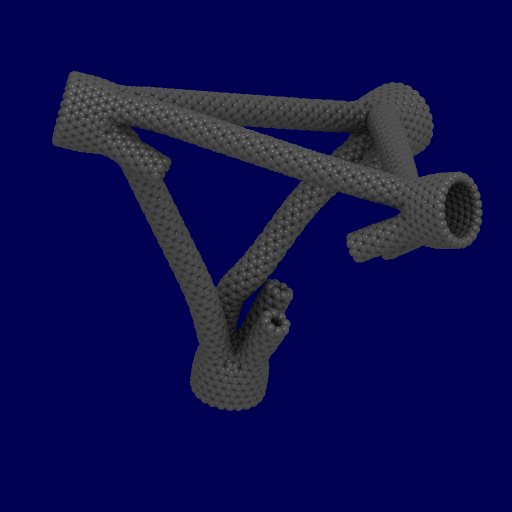
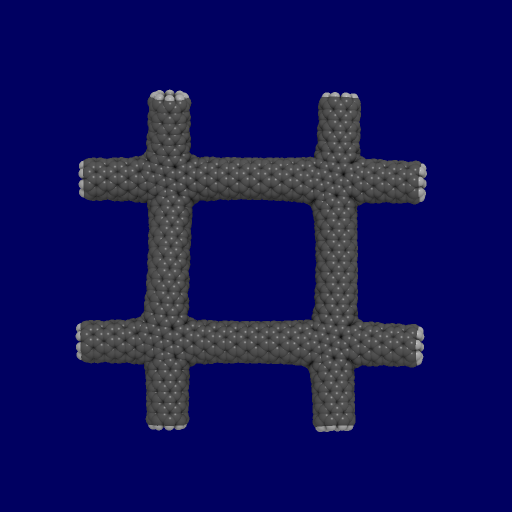
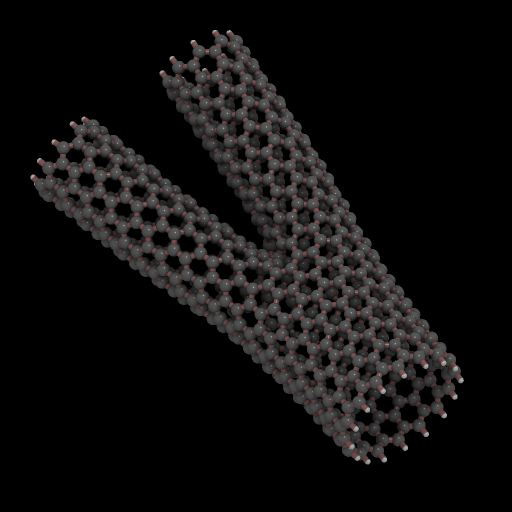
Other than trying to get a really solid pyramid, I don't know how much farther I can go. This part is two atoms shy of 9,000. When I tried to join two together at the base (minus the four square beams that would be redundant) I hit the performance wall like you would not believe, total ice age. I will try again but break up the pyramid into tiny little sections (it was built in about 20 separate "chunks" but these had to be combined to paste a copy of it into the build console); I will have to break it up again and try hiding everything I am not immediately working on.

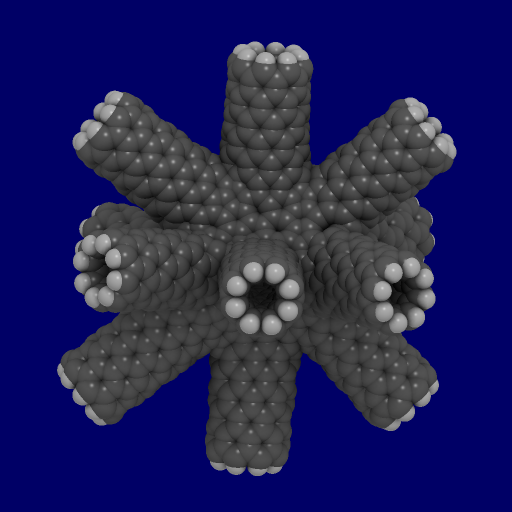
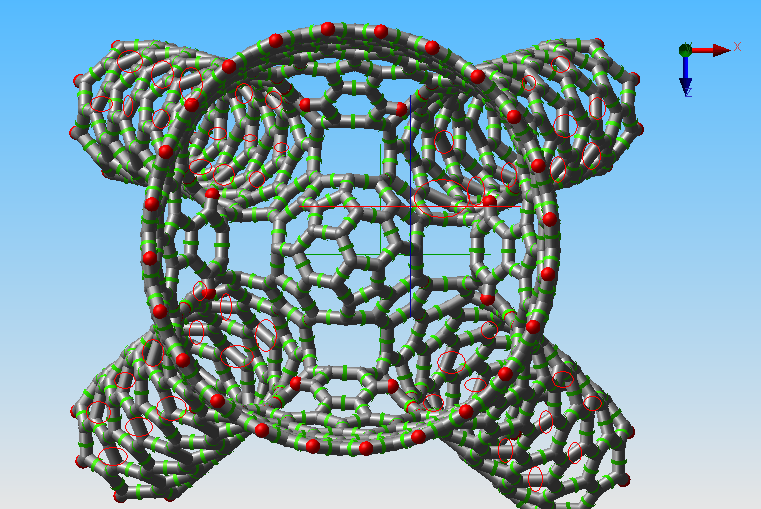
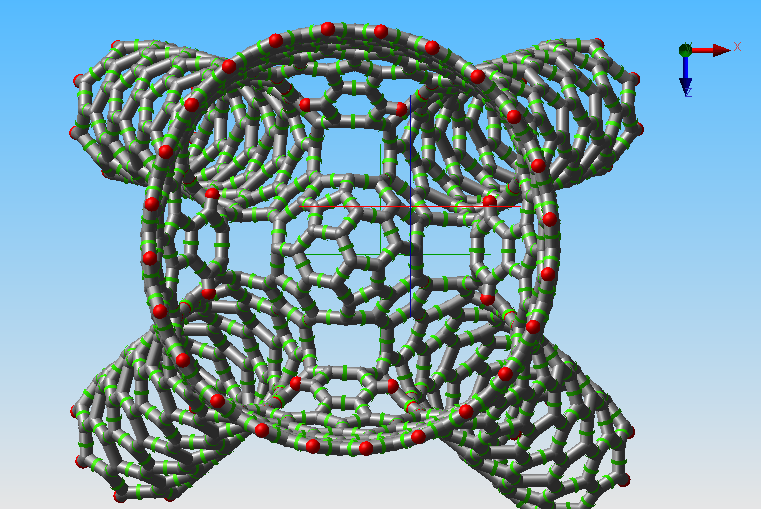
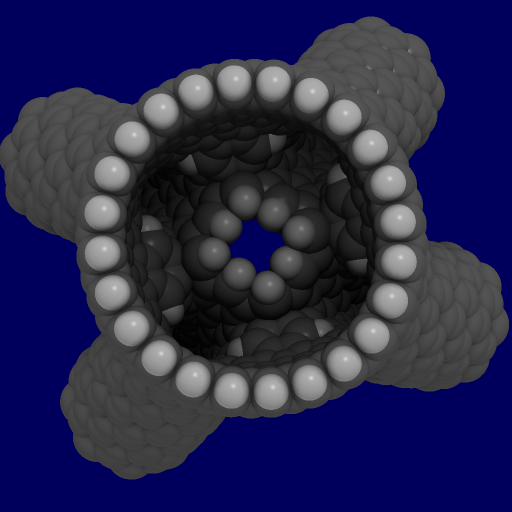
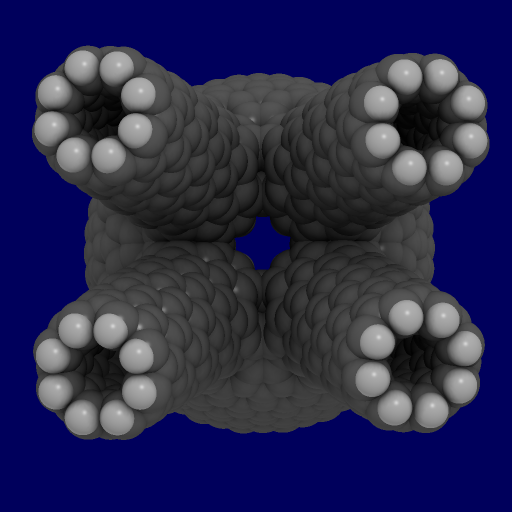
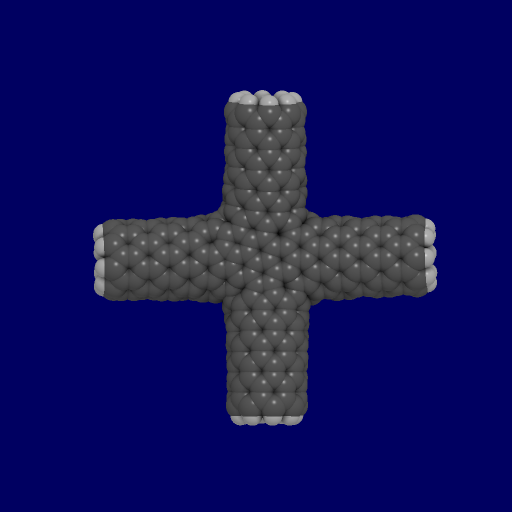
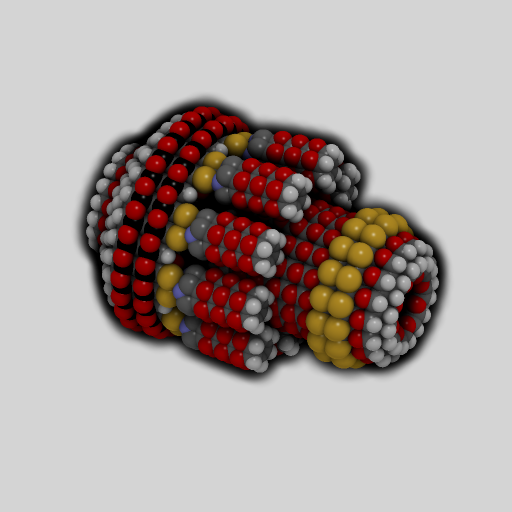
Also you can see that I swapped out the junctions at the base. The six-ways are a lot better fit and will help connecting these sections together (Jim). The four-way double ring (Moore's Junction ©), while beautiful and a triumph of geometry, probably should just be put on a pedestal*, at least for this project.

Now a couple tips when trying to build something like this:

1. Lay out the corners first and then go back and connect them. Do not (for the love of god) pick a corner and cut loose thinking you can just follow a pattern from that corner.

2. For those that are already familiar with NE1 (or soon will be) don't try to save time by using the "fuse chunks" tool. This is a feature that lets you bond a lot of atoms all at once, so, for example, you don't have to drag and bond each end atom on two tubes together. However the fuse chunks feature does just that, takes two chunks and makes them one. This doesn't help when you have to adjust the position of chunks because before when you could move two, now you can only move one. The more chunks you have, the more flexibility. Take the time to manually bond the tubes. It will save time later because you don't have to re-separate them.


*How serious do you think I am about that?

Monday, July 23, 2007

missed some bonds and another tube


Looks like I missed changing some bonds when I made the tubes I used to make this junction. I have circled some of them in this picture. It's not that big of a deal; I pretty much just have to go back and click on them to change them to graphitic. Unfortunately I have not been able to find a way to change them all at once in alpha 8, maybe alpha 9.

I sometimes have serious trouble walking away from these things for the night, so...

Here is a very rough placement of another tube. Over the next two hours or so (not tonight though) I will work on adjusting the tube and junctions to the proper shape.

a little more on the truss


Here is the inner ring capped. That took about three minutes to do. The rest of tonight's session consisted of arranging, adjusting, re-arranging, and re-adjusting various tubes and parts of tubes to make this:

This is would be the top left triangle in the picture of the truss I linked to in the last post. It still needs further adjustment to even out the little kinks and get the angles exactly right. However other than being a long drawn out P in the A, the truss is coming together.

Since the C60 pump with the full reservoir simulation is going to take a while (it's at 13% after 50 hours), I'll continue to chip away at the truss.

MTF

Sunday, July 22, 2007

start of the octet truss...the hard part

Ask and you shall receive, Jim...maybe.

Jim suggested building an octet truss, a very strong and lightweight structure. I decided to give it a try. If you are not familiar with the octet truss, click here real quick. The part below is the left most corner in the picture. For now you'll have to imagine the large tube capped and the four beams extended out, joining with similar junctions. I will use the large tube, uncapped, to connect the middle junctions. That's the rough plan for now anyway. However, and I really do hate bringing this up, but I anticipate computer performance problems that hinder building a very large truss; this may have to be a proof of concept thing.

Looking into the junction: You can see that everything is very symmetrical and orderly.

Same down here too:

What? You want a tube view to see the structure clearly? I don't know. There is a balance between trade secrets and science. Well, okay.

And off we go...

MTF

Addendum: Those familiar with NE1 will notice that there are some bonds in the tube view that are not graphitic. This was corrected shortly after this picture was taken.

Addendum 2: I think I will cap the small inner ring too

Saturday, July 21, 2007

the cnt C60 pump working


Here is the pump actually pumping something, and other than the simulation with a broken C60, it probably always would have. The latest two versions of NE1 are alpha 8 and 9. I prefer to work in alpha 8 and did all previous simulations in it. However in addition to the DNA tools incorporated into alpha 9, there were also some revisions to the nano-dynamics simulator. Apparently it now contains "newer parameters" for simulating systems like the C60 pump. I simulated the pump in alpha 9, and it works. Go figure. I guess the next step would be to fill the reservoir with C60s and cut loose, complete with graphics by QuteMol.

Also, at some point here in the near future I need to take a few days off to finish another project; don't file a missing person's report or anything.

Friday, July 20, 2007

a 3d carbon nanotube array


Here is a close up of the heptagon rings used to connect the tubes. This pattern is repeated for each of the eight junctions (corners?). Because it only takes three heptagon rings to connect three tubes, this was a lot easier to make than the 2d array where pentagons had to be used to fill in the larger curvature.

And the resulting array:

I wonder how far away we are from needing a plug-in for NE1 to drop in cnts of different conductivity, maybe like P or N tubes, a circuit-CAD plug-in, if you will.

I think I will skip a 4d array and head right to 5d; I like a challenge.

The pump simulation is still crunching away.

MTF

Thursday, July 19, 2007

a 2d carbon nanotube array


This is what I was trying to make when I built the graphene/embedded tube thing yesterday. It didn't come out right, and I was tired, so I threw a SiC frame work around it and called it a universal joint. There I've come clean. However this junction is composed entirely of pentagon and heptagon lattice defects, so I believe it is a pretty accurate representation of four tubes coming together. You can connect them together too.


Here's the actual array, a good starting point for cnt circuits (imagine some of those tubes contain nested C60s or have varying levels of conductivity themselves), structural materials for very tall elevators (imagine the blue background is the fading sky beyond the troposphere), and a very tiny game of tic-tac-toe (I built it, so I get first move).

I guess a 3d array is the next logical progression.

The cnt pump simulation is currently still crunching away.

Wednesday, July 18, 2007

a nanotube and SiC universal joint


It will be interesting to see how long this version stays together. Once a computer I can count on not to freeze up, catch on fire, or just spontaneously turn off (my favorite) becomes available, I'll run a simulation for the hell of it. In other news I can build a type of four-way carbon nanotube, but this is more of a graphene chamber with four tubes embedded.

Also I think the colored background is a nice change from all the gray, on gray, on gray on white.

Monday, July 16, 2007

the diamond camshaft


Here is the finished diamond camshaft. The final atom count came to 10,821.

well, I don't think it was sabotage, but...


While implementing a couple things on the nanotube C60 pump that Damian suggested, I just happen to completely hide the casing. Guess what I noticed. Looks like we've been playing with a broken ball. It's time to revisit the rotor based pump design.

Also the diamond camshaft is done, posts of pics soon. It's beautiful.

MTF

Friday, July 13, 2007

the start of the diamond cam shaft


Alright, so I just need two or three more of these, and I'm set.

MTF

Thursday, July 12, 2007

trying cams


Here is my first attempt at trying to build a cam. I think it still needs some work to be effective though. We'll see how it goes.

MTF

Wednesday, July 11, 2007

the C60 injector

It looks like Jim Moore (no relation) and I were pretty much on the same page with regards to a simpler design for the C60 pump, see comments for the C60 crash test results. And here is the result:


Only the plunger is moving, but QuteMol auto-adjusts causing the illusion that the housing is being pushed back.

I would still like to revisit a rotor design in the future, but for now I am thinking of new projects.

Monday, July 9, 2007

just some eye candy

A couple reposts of the planetary gear but done with QuteMol. There is one with the casing and one without.

Sunday, July 8, 2007

the branched carbon nanotube -or- Y-tube


Today I built a branched nanotube while I mull over the C60 pump.


Branched nanotubes are the product of introducing titanium/iron catalyst particles during tube synthesis. These particles cause the tubes to branch out. Of course there is a lot of research being conducted in applying branched nanotubes in molecular electronics and such. Here is a short article that explains more. I am sure you will notice that the article does not contain interesting/pretty graphics like the two above.

Saturday, July 7, 2007

C60 crash test results...5 star rating

So the buckyball is the Volvo of molecules.

Here is a simulation of a C60 molecule colliding head on with a SiC slab under a force of 5Nn, the maximum force the cnt rotor can convey.


And a pinch test, again at 5Nn:


Ideas?

still no joy


The rotor held, but the fullerene still comes apart.

I am devising some experiments to determine what forces these simulated fullerenes can withstand and if the results match experiments, or more likely, theory.

MTF

Tuesday, July 3, 2007

making beveled gears

I was never that good a pacing myself, so here is another post for today on making beveled gears. I started with a beveled gear moiety:

The atom color scheme is as follows:

gray - carbon
white - hydrogen
yellow - sulfur
black - silicon
purple - phosphorus
red - oxygen

Again, coming up with the moiety is the hard part. After I had that I could extrude different sized rings to make the gears. Like this:

The large gear was built by extruding the moiety 20 times, the middle gear 15 and the small one 10. You can see that 20 times is about the limit this moiety can be extruded and still keep a beveled edge. To go larger will take a larger moiety.

The do-or-die simulation of the cnt based pump is crunching away, but I will probably not have time to post it tomorrow.

the pea pod transistor


Nested C60 molecules in a carbon nanotube, like peas in a pea pod, alters the electronic characteristics of the tube. These characteristics can also be altered by the type and number of fullerenes inserted. The pea pod design has been proposed, and studied in depth, for use as a single electron FET.

It may be a good sign that the stuff a lot of people are interested in, building careers on, are relatively easy to model in software, at least at this level. Nothing posted here based on real science ever called for the rabbit foot rubbing.

following up on Bleyddyn's suggestion

It was suggested in a comment on the previous post that I simulate the pump without a C60 molecule in the channel. The results are interesting.

Sure the rotor still comes apart, but now we have a better idea of what is causing it to. Ruling out the interaction with the C60 molecule, my hunch lies with the casing interface. Looking closely at where the rotor comes through the casing you can see that there is a potential for interference especially since I didn't craft anything like a bushing but instead merely chopped a hole through it as is often my MO.

I will touch this up and give the cnt design a final go before switching to the bar-rotor. My sincerest thanks goes out to Bleyddyn for looking a little deeper on this than I did.

Monday, July 2, 2007

third iteration of the C60 pump


The cnt rotor just won't stay together. I have circled where the paddles start to come off.

It is interesting that the paddles that deteriorate are not the ones in contact with the C60 molecule.

I still think the paddle wheel design is the right way to go, so in this spirit I am crafting the simplest and robust paddle I can think of. Now I am going with a bar-rotor:

This is not a final design, just showing the direction I am going in now.

MTF