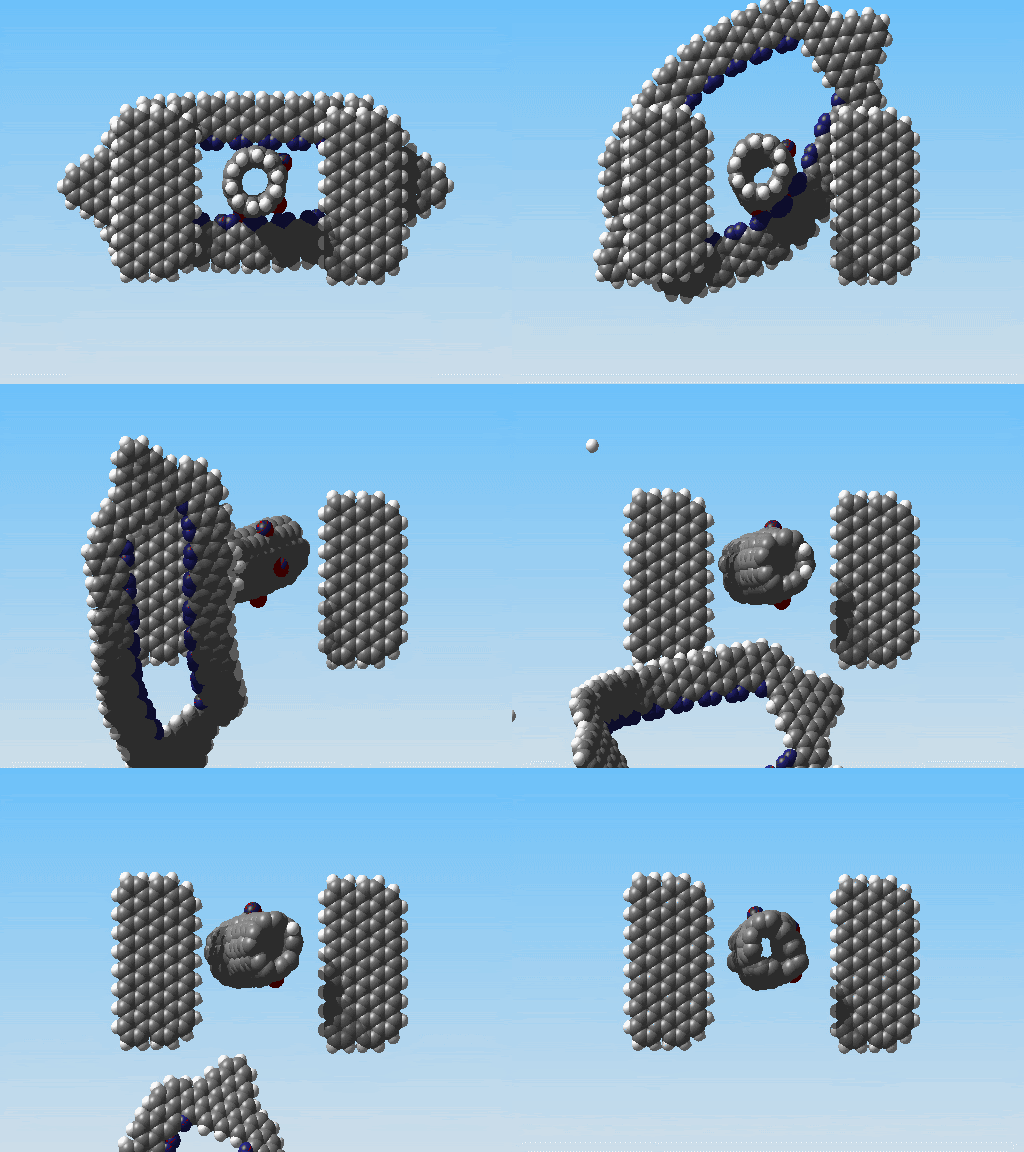
The version numbers could be a little nuts here for a while. I probably won't post anything else until they get into double digits as I can't imagine this is interesting to anyone but me. The major improvement here is the ability to distinguish different atoms in the input file and draw them accordingly. The radii still need a little adjusting.
Atom colors change as a function of their velocity using the basic how-hard-is-it-raining convention, slower is blue, white is pouring. RGB values for individual atoms were calculated from molecular dynamics data and imported as object color IPO curves. For this I expanded Miron's import IPO script to include three more curves, one for each RGB.
I plan to develop this more to represent temperatures.
The initial visualization of 550 frames, skipping two simulation steps at 50f/s, motion blur set 0.5 averaged over 5 frames. This took about 20 hours to render on a basic core 2 duo notebook.
9 frames, skipping 100 frames looped, motion blur set to 5 averaged over 16 frames. About 20 minutes per frame to render.
The astute viewer will notice two things first: 1-I still can not frame a shot for shit. 2-The back side of the rotor is missing a hydrogen atom
Well, these are still more or less movies where I am more concerned with getting different things to work than I am with cinematography and such. Maybe next time I'll throw in some long parallel walls to frame the action. Also any long time readers of this site will know that I have had my problems with hydrogen in the past, but, all in all, things have come a long way from the last time I posted anything about the famous small bearing first proposed by K. Eric Drexler back in 94, I believe.
A little about how I did it:
NE1 will save simulations in two ways, either as a binary file (which I can't do much with right now expect turn into gibberish) and a series of POV-Ray files, one for each time step. So you are probably thinking "why not just stitch the povs together, adjust the lighting, camera, materials, whatever and call it a day?" I know POV-Ray is great, and I'm pretty sure it is all Pixar uses, but I'm just a gui type of guy I guess. So I have written a Frankenstein's Monster of a script that will read in a series of povs and create atom trajectory files, one for each atom. Normally it would then just be a matter of using Miron Cuperman's import_ipo_script to connect the atom trajectory files with a PDB model which NE1 exports and Miron has also provided a very fast importer for.
The only problem here is NE1 writes the atoms in a different order in povs and PDBs. It is very important that the right trajectory matches up with the right atom. So I added another section (subroutine?) to my script that will read in the first pov ray file and create a bona fide .xyz chemical format file. I went with the .xyz because it is the simplest format I know of. Then all you have to do is run it through Open Babel to convert it into a PDB file that has the same atom order as the pov files and can be imported into Blender. That's all there is to it.
I fully intend to clean it up, rewrite parts so they're not embarrassing (even for me) but if you can't wait, you can get a copy of my ne12blendXXX.py script. The XXX stands for a couple of things. Guess!
This would not have been possible without the help of Miron Cuperman and his coding skills. Miron has written a nice python script to automate the process of importing csv data in Blender to animate objects. You can get a copy here
I will be the first to admit I am far from a Blender pro, but I hope to be able to show off some of the features that other visualizers don't have or do in a way I find cumbersome. This episode: Camera Tracking
This was a proof of concept test, so I'm not going into the details of how to do it right now. There are also a couple of steps I still need to automate to make this a practical solution; that's why there is only five atoms in this one. However I'm optimistic those can be worked out easy enough. After that I'll upload a turn-key script of sorts that will give you the features and flexibility of Blender to render GROMACS molecular dynamics simulations.
Branched carbon nanotubes have been in the literature for a while now* and make up the business end of this manipulator concept. The idea was inspired by a wire grasper out in the garage. The macro-scale version looks something like this:
The way I picture the nanotube version working is a little different in that instead of the grasping fingers retracting in, the cnt version would use electrostatic forces to extend the outer carbon nanotubes over the branched tube. This lowers the chance that the fingers slip off whatever is being grasped. This would also require the inner-most tube to be anchored.
MTF
*Branched carbon nanotube junctions predicted by computational nanotechnology and fabricated through nanowelding ,D. Srivastava, M. Menon and P.M. Ajayan, Journal of Nanoparticle Research 5: 395–400, 2003.
...this time a SEM. I finished up my qualifications for "limited supervision" use of a SEM at Michigan State Thursday. Basically I can use it as long as there is a guru at least in the building, so normal business hours. I had planned to wrap this up a couple of months ago, but right after my second training session the scope went down and then a slew of scheduling problems. The down time had nothing to do with me, despite the rumors, but something about turning off the air conditioning for season.
BSD mode Now to sweet talk my way on to the TEM and AFMs
What I mean by atom trajectories is the xyz coordinates of each atom at each time step. I could not find any program in the gmx package that did this, so I wrote my own. You can get it here.
From gromacs, use the trjconv program to create a series of pdb files for each time step of the simulation.
trjconv -s swnt -f traj.trr -o last.pdb -sep
swnt is the structure, traj is the trajectory file created from running a dynamics simulation and last.pdb is the name you give to the pdb series.
After running the script you get a text file for each atom the has the time and xyz coordinates: Here is a sample output for atom 1
Here are two small python scripts I wrote that will read in a PDB file and output a text file to be used as input for Ansys finite element analysis. They're still kind of rough in that the input directory is hard coded, but they seem to work great at least for carbon nanotubes and other fullerenes.
1. create a protein data bank file of your structure 2. name it test.pdb and save it in a folder: C:\xyz 3. make sure you have python installed 4. and to make things easier for development and use, grab the free version of Wingware IDE 101 5. download the two scripts and open them in Wing 6. run the scripts
The output file will be in the xyz directory. To load them in Ansys: File > Read input from...